Appointment Actions
These actions are all context sensitive. This means that you will see different options based on the status of the appointment.
Confirm Appointment
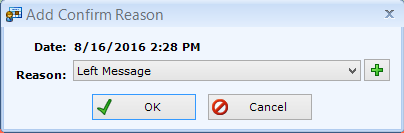
Displayed when the appointment has NOT been confirmed (either by the patient through appointment reminders, or manually by a patientNOW user). When selected, you are asked to select the confirmation reason.
Clear Confirmation
Useful when you accidentally confirm a patient’s appointment. Displays when appointment HAS been previously confirmed. When selected, the appointment confirmation will be removed and the appointment will show as not confirmed.
Check-In Appointment
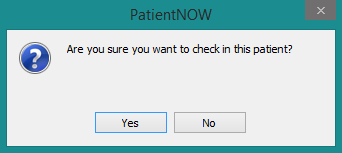
Displays when the appointment has NOT been checked in by a patientNOW user. patientNOW will ask you to confirm your selection.
Clear Checked-in
Useful when you accidentally check in a patient. Displays when appointment HAS been previously checked in by a patientNOW user. When selected, the appointment check-in will be removed and the appointment will show as not checked in.
Check-Out Appointment
Shows when appointment HAS been previously checked IN by a patientNOW user. patientNOW will ask you to confirm your selection.For additional information, check out Checking Out an Appointment
Clear Checked Out
Useful when you accidentally check out a patient. Displays when appointment HAS been previously checked out by a patientNOW user. When selected, the appointment check-out will be removed and the appointment will show as not checked out.
Change Appointment
These actions apply when you wish to change the appointment in some way. These actions are all context sensitive. This means that you will see different options based on the status of theappointment.
Cancel Appointment
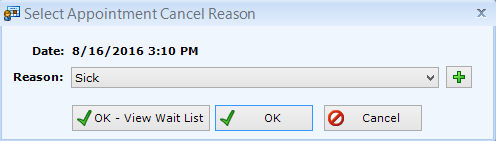
Displays when the appointment has NOT been either Cancelled or No-showed by a patientNOW user. When selected, you will be asked to select a Reason for canceling the appointment.
Clear Cancel
Useful when you accidentally cancel a patient’s appointment. Displays when appointment HAS been previously cancelled. When selected, the appointment cancellation will be removed and the appointment will show as not cancelled.patientNOW will ask you to confirm your selection.
Note: Clearing the cancellation may affect Pathways!
No Show Appointment
Displays when the appointment has NOT been marked No Show by a patientNOW user. patientNOW will ask you to confirm your selection.
Clear No Show
Useful when you accidentally No Show a patient’s appointment. Displays when appointment HAS been previously marked as a No Show. When selected, the appointment No Show will be removed and the appointment will show as not no showed.
Note: Clearing the No Show may affect Pathways!
Copy Appointment
When selected, patientNOW stores the appointment information in memory. Then, you may navigate to the day and time to which you wish to copy the appointment.
Once you’ve found the new day and time, just right-click and select Paste. The Add Appointment dialog will then appear with all of the information from the original appointment, except the Date and Time.
Reschedule Appointment
When selected, patientNOW will ask you to confirm your selection. patientNOW then stores the appointment information in memory. Then, you may navigate to the day and time on which you wish to reschedule the appointment.
Once you’ve found the new day and time, just right-click and select Paste. The Add Appointment dialog will then appear with all of the information from the original appointment, except the Date and Time.
The original appointment is marked Cancelled and Rescheduled.
Delete Appointment
Displays when the appointment has NOT been marked deleted by a patientNOW user.patientNOW will ask you to confirm your selection.
Clear Delete
Useful when you accidentally delete a patient’s appointment. Displays when appointment HAS been previously deleted. When selected, the appointment deletion will be reversed and the appointment will show as not deleted.
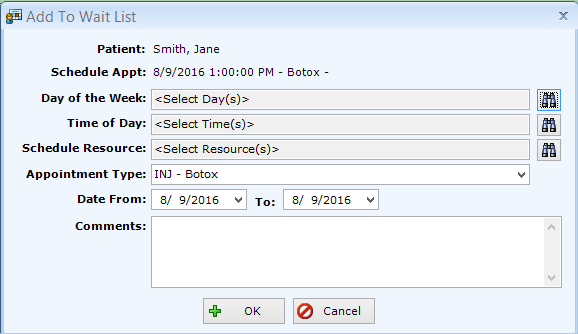
Add to Wait List
Displays the Add To Wait List dialog.
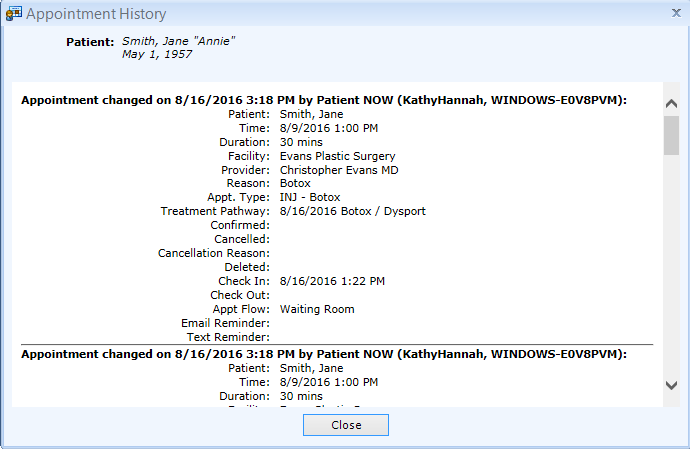
View Appointment History
Displays the Appointment History Dialog.
Create Actions
These actions apply to the patient identified on the appointment. When any of these options are selected, the patient will be placed in focus in the Blue ID Bar.
Select Patient Current Medical
Moves you to the Patients | Clinical Information, Current Medical tab.
Create Consent Form
The easiest way to create surgical consents. Moves you to the Patients | Patient Communications, Treatment Pathways tab
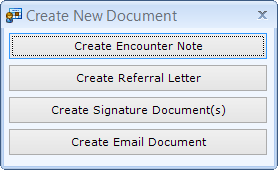
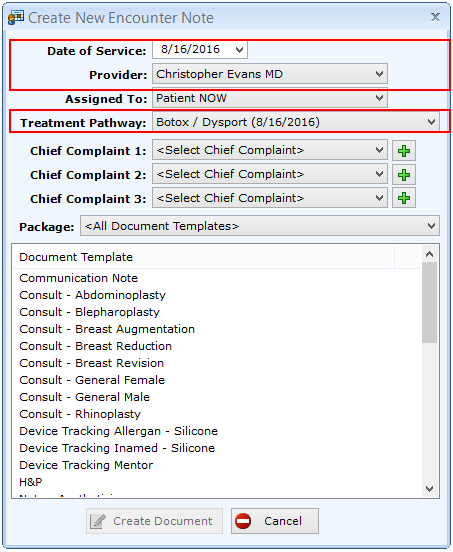
Create Encounter Note
Displays the Create New Document dialog. Has the same effect as navigating to Patients | Document Creation, Create a New Document tab and clicking on the Create New Document button.
From the appointment, patientNOW will automatically fill in the Date of Service, Provider, and Treatment Pathway.
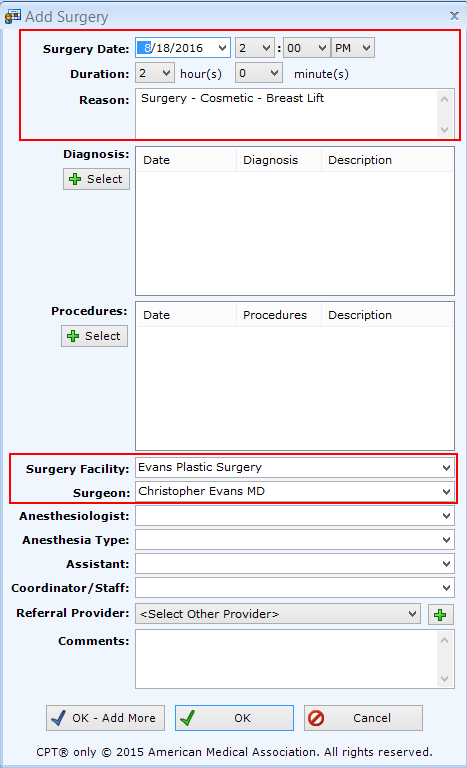
Create Surgery Record
From the appointment, patientNOW will automatically fill in the Surgery Date, Time, and Duration as well as Facility, Surgeon, and Reason.
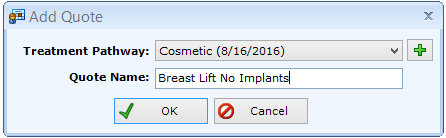
Create Quote
Has the same effect as navigating to Patients | Registration/Billing, Quotes tab and clicking Add button. Displays Add Quote dialog with the Treatment Pathway preselected.
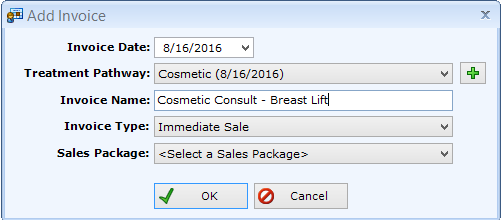
Create Invoice
Has the same effect as navigating to Patients | Registration/Billing, Invoices Tab and clicking Add button. Displays Add Invoice dialog with the Invoice Date and Treatment Pathway preselected.
Print Actions
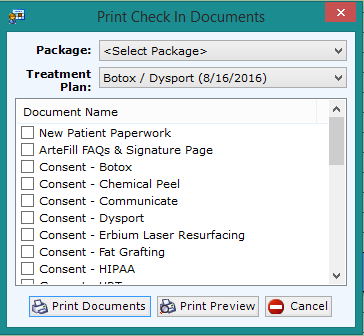
Print Check In Documents
When selected, displays the Print Check In Documents dialog.
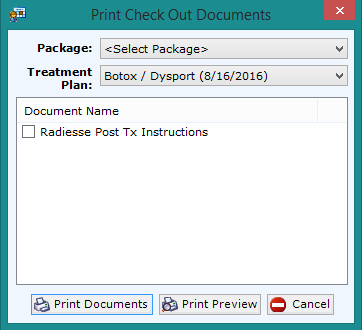
Print Check Out Documents
When selected, displays the Print Check Out Documents dialog.
Patient Actions
Select Patient
Places patient in focus in the Blue ID Bar while the user remains on the schedule.
MyPatientNOW Sync
This option only shows if your practice is configured for myPatientNOW. It is used to Invite the patient to complete the portal. For additional information, check out Sync Patient with MyPatientNOW.
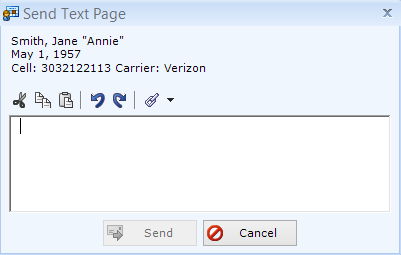
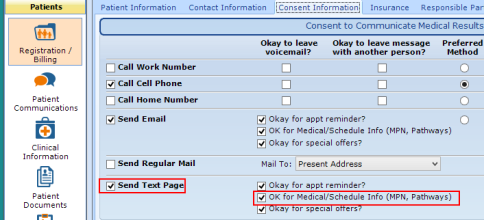
Send Text Page
This option will only appear if the patient has consented to receive texts on the Patients | Registration/Billing, Consents tab.
When selected the Send Text Page dialog appears. Once you begin typing, the Send button will enable. By selecting the down arrow next to the chain link, you can drop in information from the Patient record or the Appointment.