Office appointments are used to indicate that a schedule resource is unavailable during a specific time frame for a meeting or other non-patient facing reason. Note: Office Appointments are NOT designed to show that a resource is out of the office. This should be done by marking the resource out-of-office.
See below for information on
- Scheduling an Office Appointment
- Editing an Office Appointment
- Deleting an Office Appointment
- Viewing Office Appointment History
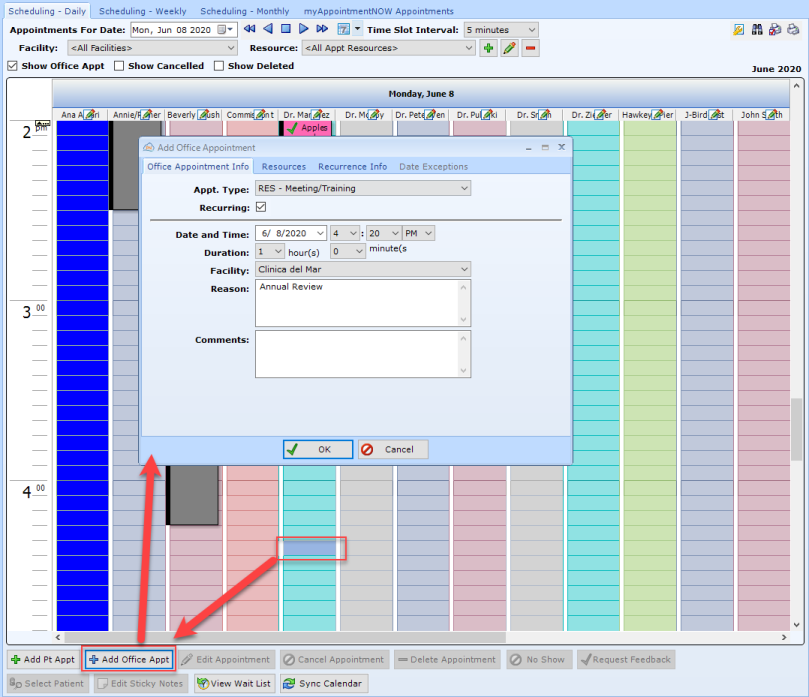
Scheduling an Office Appointment
You may not schedule an Office Appointment by double-clicking in the schedule. Instead, you will need to single click on the correct day, time and resource.
On the Add Office Appointment dialog, enter the following
Appt. Type
Recurring. Select recurring box if the appointment will occur more than one time on a regular basis, and review the Recurrence Information below.
Start Time. Make sure the date and time are correct for the start time.
Duration. The default is 1 hour.
Reason. Defaults to the appointment type, but you can change it to be more descriptive.
Comments. Add as appropriate (e.g. in the Lunch Room).
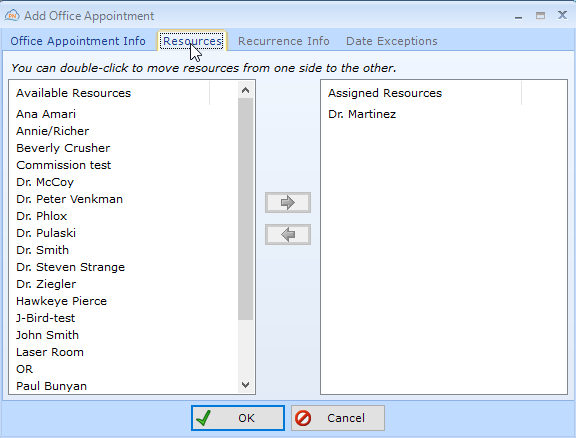
If more than one schedule resource is involved in this appointment, you will need to select the Resources sub tab and double-click each resource to move them to Assigned Resources.
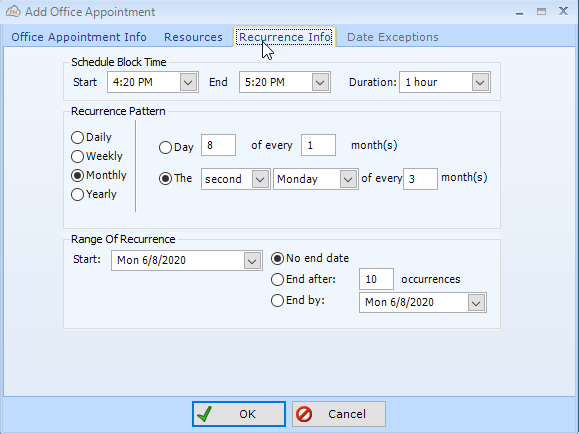
If this is a recurring meeting, select the Recurrence Info sub tab and enter the Recurrence Information.
The Start and End Time and Duration are shown from the Office Appointment Info tab.
You may set up a recurring pattern that occurs every x days, weeks, months, or years.
Set the day of the month or the # of days, weeks, months.
Specify when the recurring appointments will end.
Editing an Office Appointment
To edit an Office Appointment, just double-click to open the Edit Office Appointment dialog. It will look the same as the Add Office Appointment dialog.
You may also single-click on the appointment and select Edit Appointment at the bottom of the screen.
Deleting an Office Appointment
To delete an Office Appointment, right click on the appointment and select Delete Appointment, or left click and select Delete Appointment at the bottom of the screen.
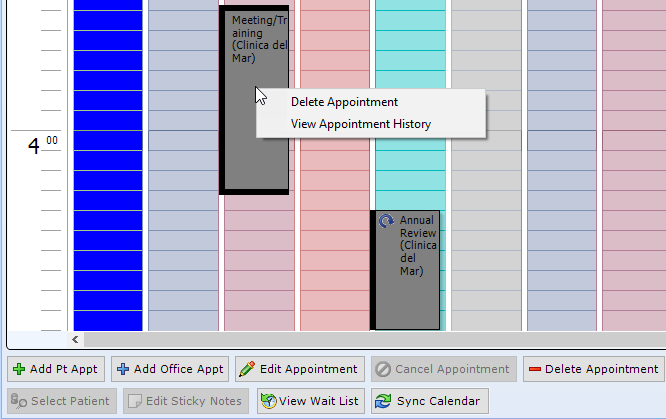
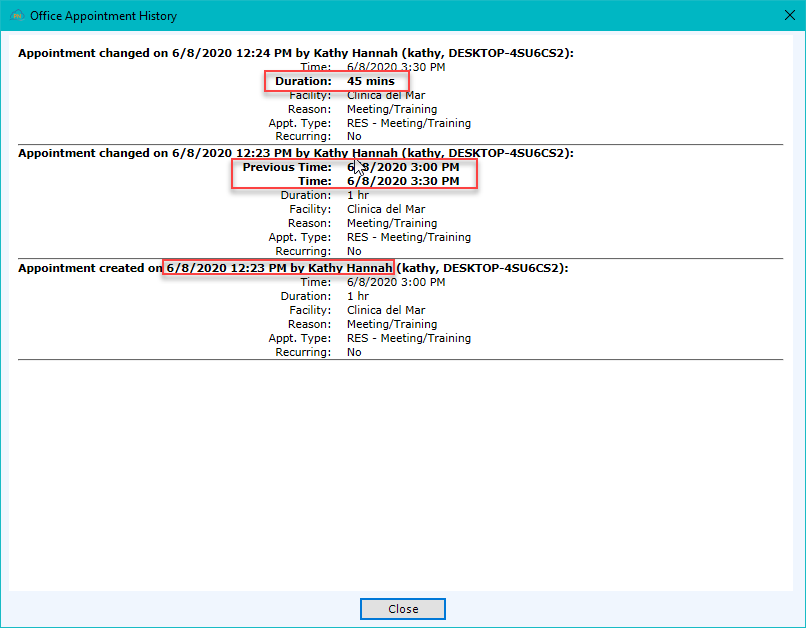
Viewing Office Appointment History
Each time the Office Appointment is added, edited, or deleted, patientNOW keeps a record of the change, the user responsible and the date and time the change was made.
To see the History, right-click on the Office Appointment and select View Appointment History.
The bold information in the window below shows what information was changed and how.