If your practice utilizes Treatment Pathways, you may need to schedule from the Treatment Pathways tab. See your office administrator to determine how they are used in your practice.
Schedule an Appointment
Note: Editing an appointment also uses the information below; just double-click on the appointment to edit the details.
To schedule a patient appointment, navigate to Workflow | Scheduling, Scheduling – Daily tab.
Navigate to the correct day and time using the navigation tools at the top of the tab. For additional information, check out Your patientNOW Schedule.
Warning: patientNOW uses the patient in focus to schedule. To make sure that you don’t schedule the wrong patient, ALWAYS select Clear Patient before scheduling.
Double-click on the correct resource day/time for the appointment.
Select the correct patient.
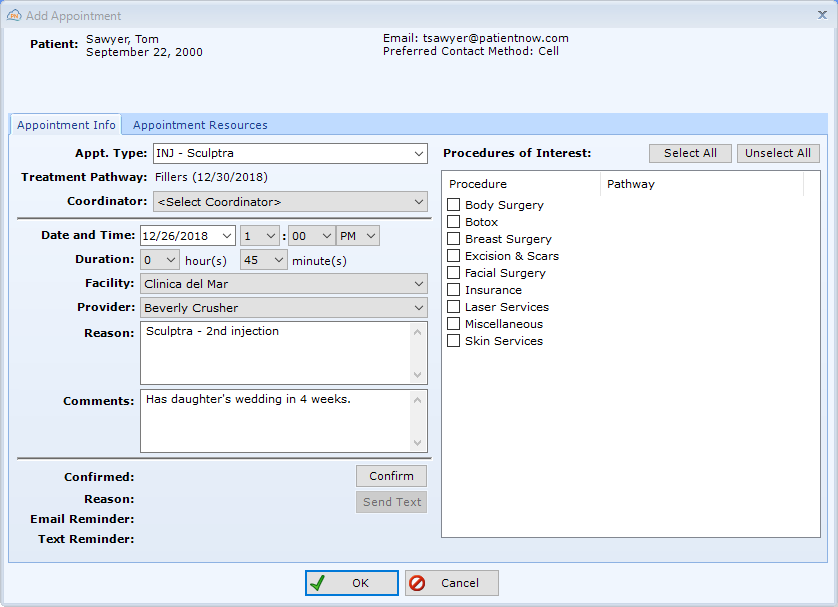
When the Add Appointment window appears, complete the information.
- Appt Type. When selected, this will set default values for Duration, Reason, and Comments.
- Coordinator: Only used when Treatment Pathways are used and there are multiple coordinators in the office.
- Date and Time. These are set automatically to the date and time on which you double-clicked to start the appointment.
- Facility. Please ALWAYS check that this is correct.
- Provider. This is set automatically to the resource on which you double-clicked to start the appointment; please check for accuracy.
- Reason. Filled in by the appointment type (Sculptra in this example); add detail as appropriate.
- Comments. Put important notes specific to that patient in this area.
- Procedures of Interest. If the patient has areas of interest that are different from their current appointment, select them here.
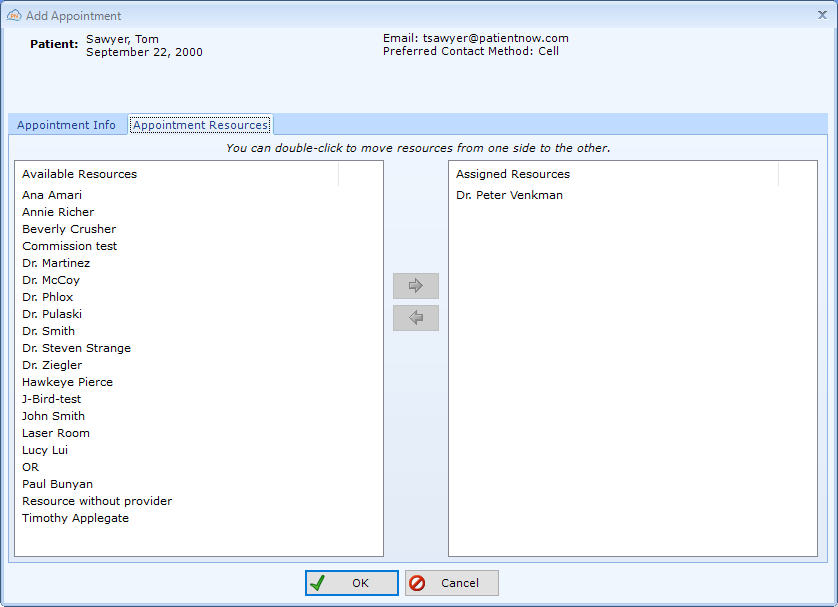
- Appointment Resources. See second screen shot. If more than one provider will be involved, or if a specific room or equipment is required, make sure they are selected on the Appointment Resources tab.