Note: you must have a local scanner installed at your workstation. If you do not, contact your office administrator. We cover the following topics.
- Prepare to Scan
- Scan
- Select Page(s) to Manipulate or Import
- Manipulating Scanned Documents
- Import Documents
- Viewing Scanned Documents
Prepare to Scan
Navigate to Workflow | Batch Processing, Batch Scanning tab.
Make sure that all of the setup is complete; see buttons at upper left side of tab. You do not need to perform this setup for every scan. Normally, just the first time you scan each day.
| Select Scanner |  | 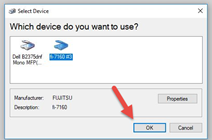 |
| Scanner Control |  | When selected, the scanner control for your installed scanner will appear each time you scan. This is useful if you sometimes scan in black and white and sometimes in color. |
| Driver Type (specific to your scanner) |  | 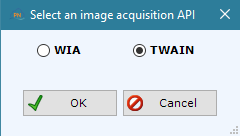 |
Scan
Select the Start Scan button.
patientNOW will trigger the scanner to begin scanning and you will see the preview thumbnails in the window below.
Select Page(s) to Manipulate or Import
You may select page(s) to change or import in one of 3 ways.
- Click the Select All Button at the lower left.
- Select the <ctrl> key and then click individually on the page(s) you wish to select.
- Select the <Shift> key, click on the first page and then on the last page.
Manipulating Scanned Documents
Above the thumbnails in the preview window are the document manipulation functions. Select page(s) to manipulate and select any of the following.
| Save |  | Saves the highlighted page(s) to a location on your computer. |
| Deskew / Despeckle |  | Straightens and cleans image. |
| Zoom Out |  | Makes the preview image smaller. |
| Zoom In |  | Makes the preview image bigger. |
| Fit Horizontal |  | Fits the highlighted page horizontally in the preview window. |
| Fit Vertical |  | Fits the highlighted page vertically in the preview window |
| Rotate to Left |  | Rotates page(s) counter-clockwise 90 degrees. |
| Rotate to Right |  | Rotates page(s) counter-clockwise 90 degrees. |
| Crop |  | Allows you to crop out unwanted information before saving. |
| Move Left |  | Highlights the page to the left of the currently highlighted page. |
| Move Right |  | Highlights the page to the right of the currently highlighted page. |
| Copy to Clipboard |  | Copies the highlighted page(s) to the clipboard. |
| Add to Presentation |  | Adds image to Presentation in Multimedia | Photo Management, Photo Presentation tab. |
Import Documents into Patient Chart
Warning: patientNOW uses the patient in focus to import documents. To make sure that you don’t import scanned documents into the wrong patient, ALWAYS select Clear Patient before scanning.
Select Patient.
Select page(s) to import.
Select Import Documents.
The Add Document dialog appears. Complete the information.
- Document Type. Choose the type that most closely describes the scanned documents.
- TAB Name. Choose the tab under which the documents should be filed in Patients | Patient Documents.
- Description. Enter a description of the document.
- Assigned To. If you want another patientNOW user to review this scanned document, select the user here.
- Document Status. When assigning the scanned document to another user, select the reason you are assigning it to them.
Select OK.
Viewing Scanned Documents
Navigate to Patients | Patient Documents and select the Tab under which the documents are filed.
Look for the description you entered under document description.
Click on document in upper window.
You will see a preview of the document in the lower window.