Once your Merchant Processing Application (MPA) is approved, you will receive your new Clover Mini device in 7 to 10 days.
Follow the steps below, and if you have any questions, contact support at support@patientnow.com. Be sure to include details.
There are 3 steps to configure your Device. You should be prepared to restart your workstation 2 to 3 times, so you should close any work you may have open.
Activation
Prepare for Activation
You will receive an activation code in an email directly from Clover. If you do not receive the code, please contact Patient NOW Sales at sales@patientnow.com or (720) 214-7140; they can request that Clover resend the email.
During the activation, you will also need to connect your Clover device to your local network, either direct connect through a cable, or over your wireless router.
Activate Device
Follow Clover’s step-by-step guide: Connect and activate your Clover Mini.
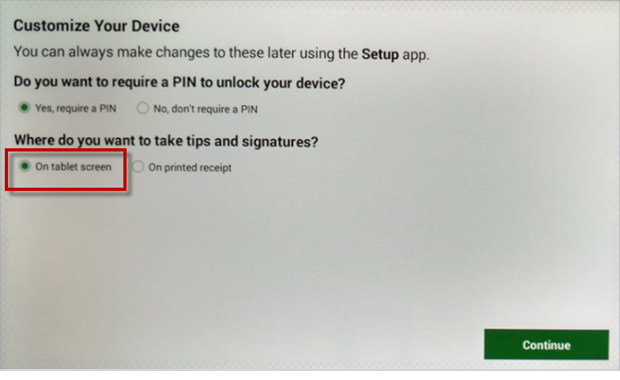
On the final setup screen, you will be asked where you want to take tips and signatures. You must select “On tablet screen”.
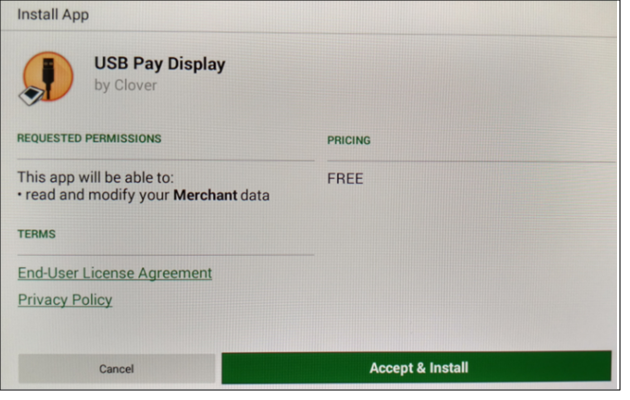
Install the USB Pay Display App
This app must be running on your Clover Mini to run integrated credit card transactions, refunds, or voids through PatientNOW.
On the home screen, select the App Market icon and search for the USB Pay Display app.
Select the FREE – Subscribe option, then select Accept & Install. The download and installation should begin automatically. Once it has finished, run the app.
Your Clover Mini device uses 2 1/4 inch by 85 feet thermal paper rolls. You may order these through any office supply store.
Workstation Installation
When patientNOW is installing on the workstation, you will be asked if you use the Clover Mini on that workstation. If you respond yes, patientNOW automatically installs or updates the drivers and service that the Clover needs to communicate with the workstation and patientNOW.
Contact patientNOW Support
Now that your Clover Mini device is successfully activated and installed on your workstation, we will need to turn on the integration.
Please contact support at support@patientnow.com and let them know that your device is installed and you are ready for integration to be turned on.
Configure your Clover for Gratuity (Tips)
You have the option on your Clover Mini to show preset tip suggestions or to ask the customer to enter a custom tip amount.
You may enable and configure the Tips on the Clover Mini device or through the Clover Website portal.
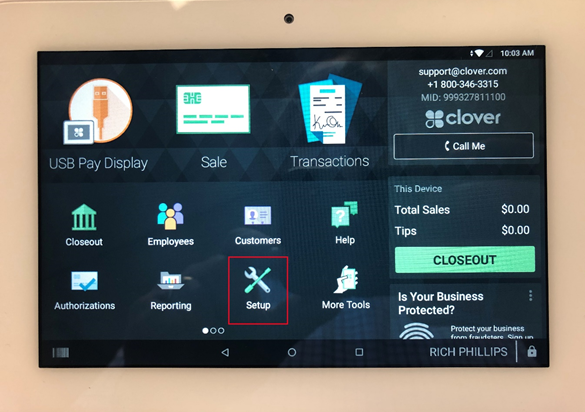
Setup Tips on the Clover Mini Device
Select the Setup Icon from the Clover Home Screen.
Select the Tips Section.
Enable Ask for Tips
- Select Ask for tip (always requires signature) checkbox.
- Select Save.
Enable Tip Entry on Tablet
- Select Tip Entry Location.
- Select On Tablet Screen.
- Select Save.
Tip Suggestion Amounts
You may configure up to 4 default tip suggestions for a customer to choose from (e.g. 15%) when they are entering tip on the Clover Mini. These options are a % of total sale.
Select Tip Suggestions.
Enter Tip % (e.g. 15)
Enter label description (e.g. “15%”).
Select the checkbox for each tip % you wish to display to the cardholder.Note: If you deselect all tip options and tips are enabled, a prompt to enter a custom tip amount will display on the screen or receipt.
Select Save.

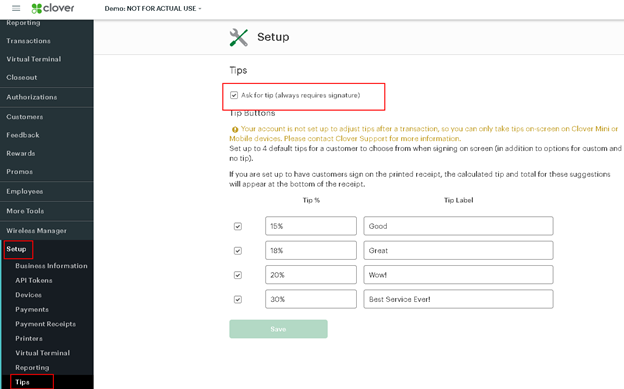
Configure Gratuity (Tips) on the Clover Website
You can log into the Clover Website and enable the Tip functions on the Clover devices. Click here to get to the Clover Dashboard. Once logged in to the portal:
Select Setup.
Select Tips.
Select Ask for Tip and then edit the tip suggestions to fit your practice.
Select Save; the Clover device will update automatically.
Your Clover Mini configured for Gratuity (Tips)
Once you have it configured, the customer will see the screen below when paying.
