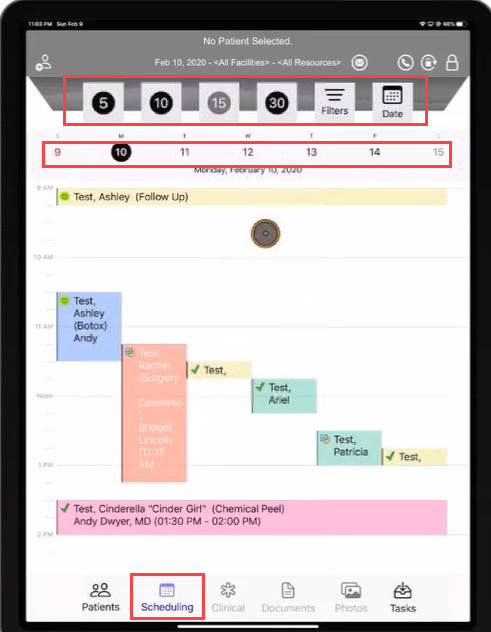
You may view the schedule by selecting the Schedule icon (2nd from the left at the bottom of the screen).
Navigate the Schedule
You may “flick” the screen up or down to quickly scroll. To control the scroll speed, you may swipe up or down.
To switch between days, you may:
- swipe to the left for the next day and to the right for the previous day
- select the date button with the calendar at the upper right corner of the screen
- select the date (9, 10, 11, 12, 13, 14, or 15 at the top of the screen shot below.
You may change the time interval for the schedule display by selecting the 5, 10, 15, or 30 buttons at the top of the screen.
Appointment Details and Actions
Selecting an appointment displays additional information about the appointment, in addition to allowing some appointment actions.
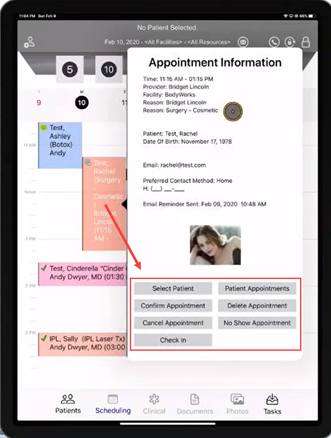
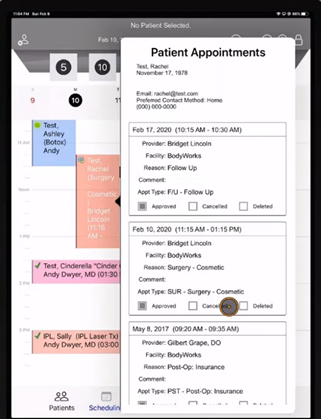
To view a full list of the patient’s appointments and the status of the other appointments, select the Patient Appointments Option.
Filter the Schedule Display by Provider (Resource) or Facility
The facilities and appointment resources in the current Schedule display are listed at the top of the screen.
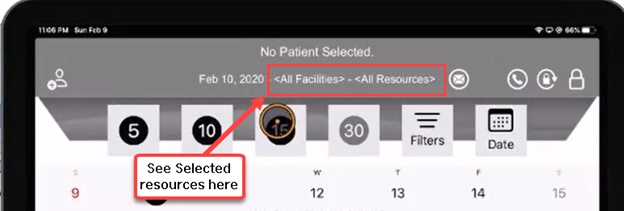
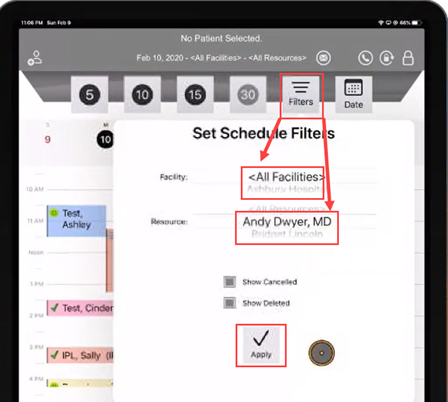
If you wish to see only certain facility(ies) or resource(s), you may select the Filters button and change the display.
Add a Patient Appointment to Schedule
Select the patient by selecting the person icon in the upper left corner. Warning: always make sure the correct patient is reflected at the top of the screen, or you will be scheduling the wrong patient.
Select the correct date and then select a grey + sign on the right side of the screen to schedule the appointment at that time.
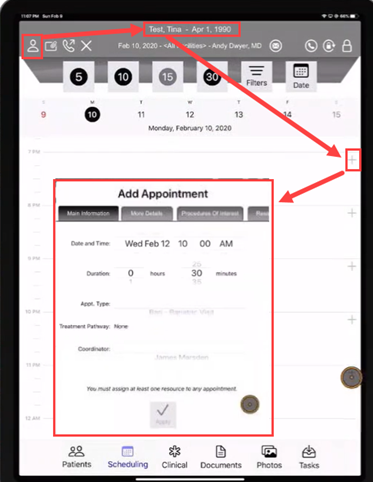
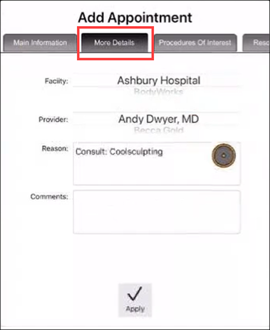
Select each tab across the top of the Add Appointment dialog to make sure all the information is correct. You may swipe left to move from tab to tab.
The most important information is on the More Details tab. This is where you select Facility, Provider, Reason, and Comments for the appointment.