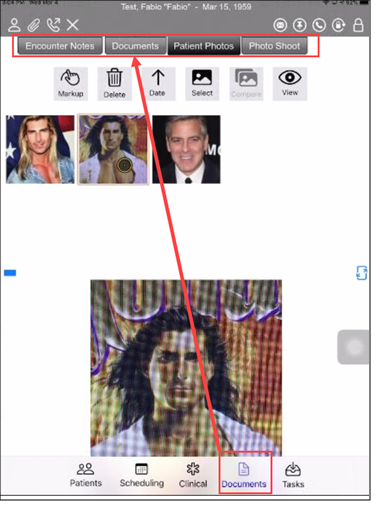
You may access the previous pictures of the patient or use the Photo Shoot feature by selecting Documents at the bottom of the screen.
Viewing and Editing Previous Pictures
Select a photo; you may zoom in or out by “pinching” or “spreading” your fingers.
Create a Side-by-Side Comparison
Select the first photo.
Select the Select Button at top of screen under Patient Photos.
Select the second photo.
Select the Compare Button at the top of the screen.

Edit or Mark Up a Photo
Select the photo and select Markup button at top.
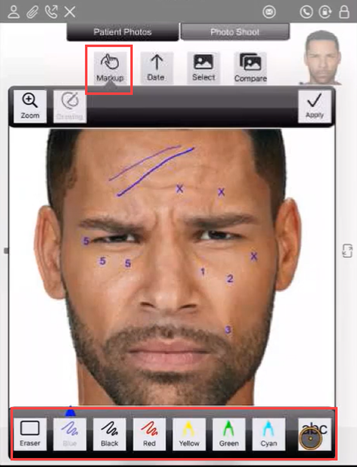
You may mark up the photo in any of the following ways.
- Thin pens in Blue, Black, and Red.
- Highlighters in Yellow, Green, and Cyan.
- Apply text as numbers, letters or free text.
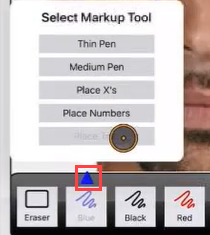
Select the blue triangle above the markup tool menu to select the tool.
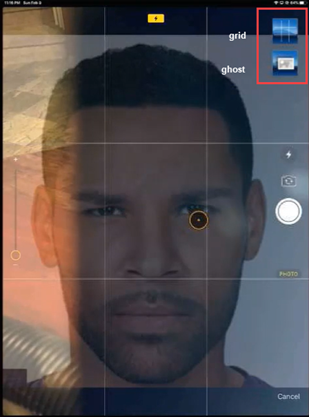
Take Pictures with Photo Shoot
Photo Shoot provides tools for you to take new pictures that are as similar to old pictures as possible. These tools are Grid and Ghost.
Select previous photo you wish to repeat.
Select Photo Shoot in upper right hand corner.
Select Camera button to take a new photo; you will see the previous picture in upper right hand corner.
You may select Grid, Ghost, or both to line up the new image.
Select the white camera button.