Any User(s) with the “Reconciliation” tab enabled in the “Back Office” > “Financial” module can run Financial Reconciliation Reports. Please see “Setting Up Financial Reconciliation Rights” for details. Most practices utilize this feature at the end of every business day, although PatientNow allows practices to choose any date range.
Any User designated as a “Financial Admin” will receive the Financial Reconciliation Report Summary as a .PDF file for review. See “Setting Up Financial Reconciliation Rights – ‘Financial Admin’ ” for how to set up a user to receive Financial Reconciliation Reports.
Page Layout
To view the Financial Reconciliation page:
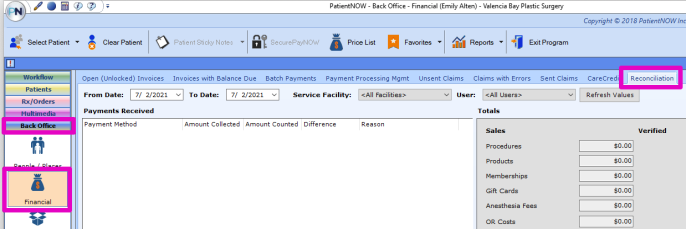
1. Click the “Back Office” module from the menu on the left.
2. Click the “Financial” sub-module.
3. Click the “Reconciliation” tab on the top right.
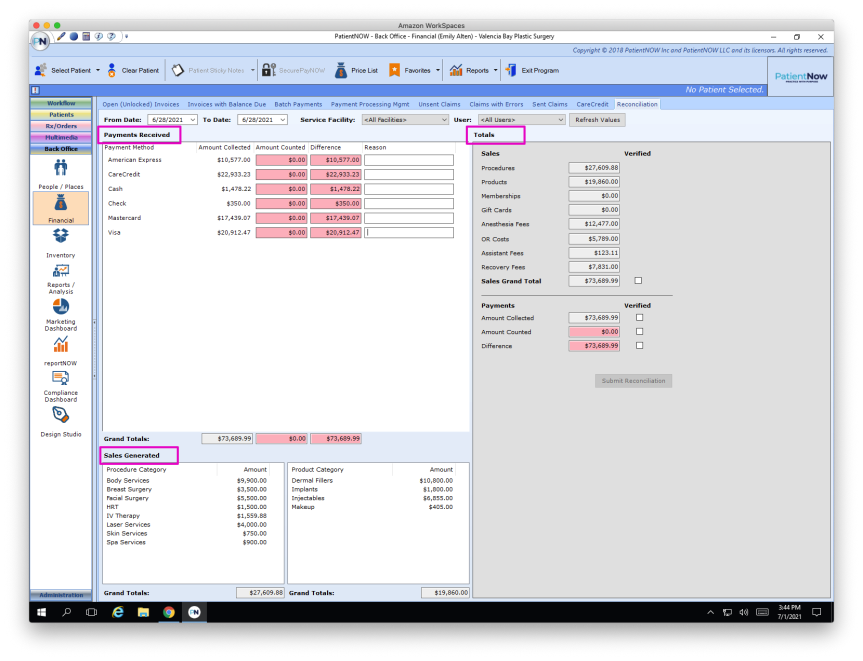
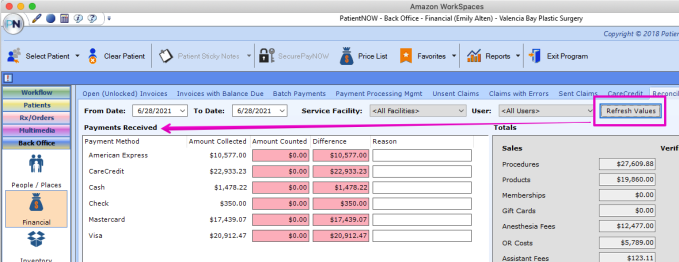
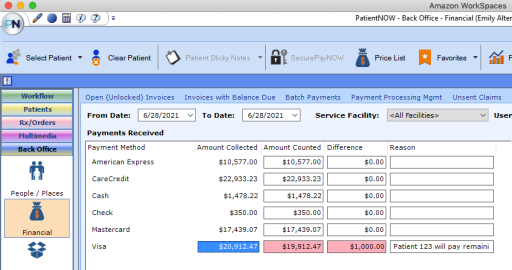
- Payments Received: The center section displays the Amount Collected by Payment Type. This is where users will enter the Amount Counted at the end of each day/week/desired date period.
- Sales Generated: The bottom section displays Sales Generated divided by specific Procedures and Products.
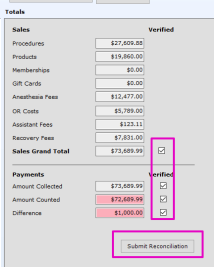
- Totals: The right section displays Total Sales divided by type (ie. Procedure, Product, Memberships, etc.)
Choose the Date(s) to Review
1. Navigate to “Back Office” > “Financial” > “Reconciliation.”
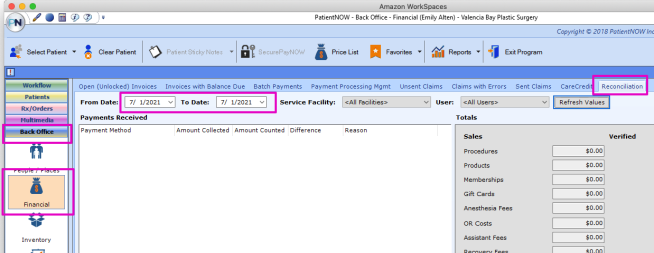
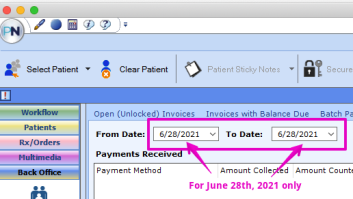
2. The date range will automatically show today as the “From Date” and “To Date.” To select a different date range, use the appropriate dropdown arrow to select a different “From Date” and/or “To Date.”
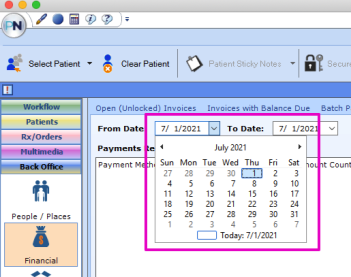
2a. To select a single date, choose the desired date for both “From Date” and “To Date.”
3. Click “Refresh Values” to update the “Payments Received” section.
Optional: Select Service Facility and/or User
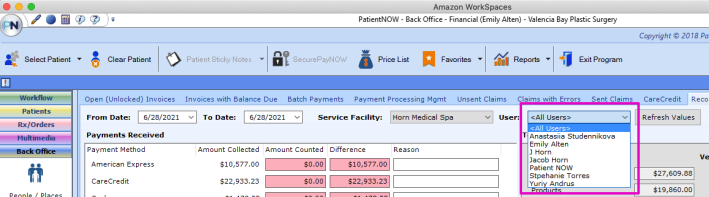
The default selection is “All Facilities” and “All Users.” However, to run a report on a specific facility, a specific user, or both:
1. Use the dropdown menus to select the desired facility and/or user.
Select Service Facility
Select User
2. Click “Refresh Values” to update the “Payments Received” section.
_773x298.png)
Count the Payments/Drawer
With the desired selections, the totals for each payment type will appear in the “Payments Received” section.
1. Add up the receipts/checks/cash and enter the counted amount in the “Amount Counted” column next to the appropriate payment method. The line will turn white when the “Amount Collected” and the “Amount Counted” match.
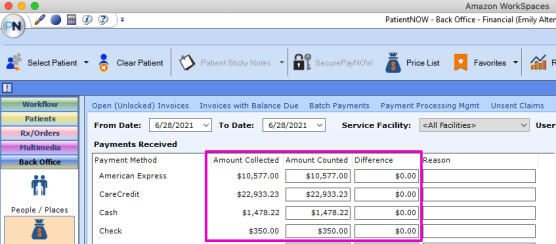
2. If the Amount Collected and the Amount Counted do not match, the lines will remain red and display the Difference. Notes may be written in the “Reason” text box to the right.
Verify and Submit Reconciliation
Once all appropriate numbers have been entered into the “Amount Counted” column, and any necessary notes have been entered into the “Reason” text box, the Financial Reconciliation is ready to be submitted.
1. Verify the Grand Total, Amount Collected, Amount Counted, and Differences, and check the necessary “Verified” boxes.
2. Click “Submit Reconciliation” to send the Financial Reconciliation Report to all Financial Admins.
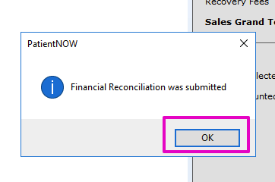
3. When the Financial Reconciliation Report has been Submitted, a success message will appear. Click “OK” to close.
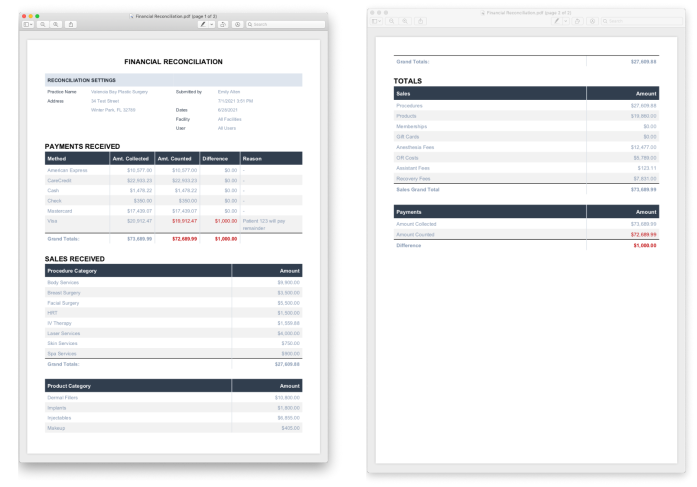
The Financial Reconciliation Report
The Financial Reconciliation Report is generated as a .PDF file. Below is an example:
Summary
The PatientNOW Financial Reconciliation allows practices to review all Sales made on a particular date or date range. Reports may be run on:
- A specific Service Facility
- A specific User
- A specific Service Facility AND specific User.
Any User designated as a “Financial Admin” will receive the Financial Reconciliation Report Summary as a .PDF file for review. See “Setting Up Financial Reconciliation Rights – ‘Financial Admin’ ” for how to set up a user to receive Financial Reconciliation Reports.