The CPL Integration must be enabled by patientNOW in order for you to use it. Contact your CPL Rep to request the integration.
There are 4 parts to the configuration:
- Add the CPL Account # to the correct Service Facility
- Load the Order Requisition Document Template
- Create the Order / Requisition Clinical Template
- Create your list of Favorite Tests, Panels, and Profiles
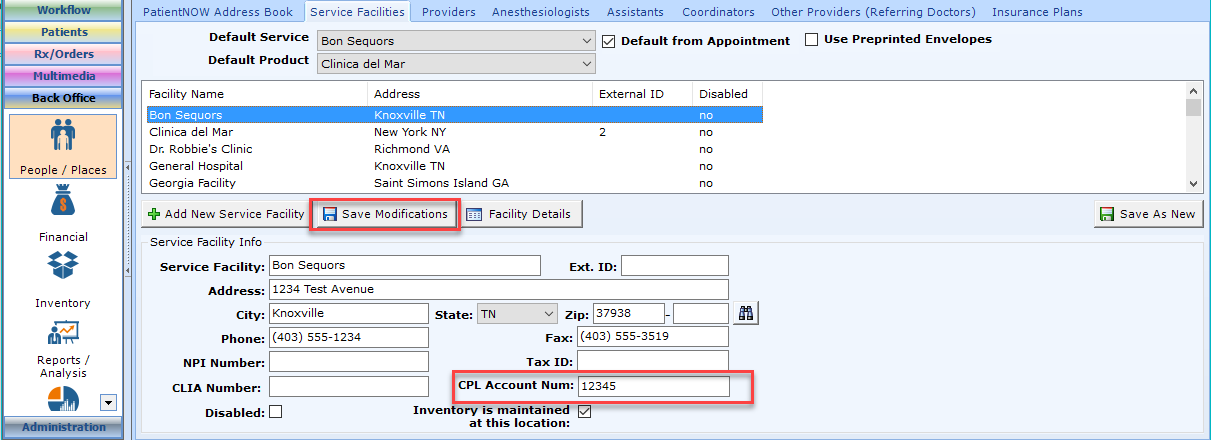
Add the CPL Account # to Service Facilities
Navigate to Back Office | People / Places, Service Facilities tab.
Select the appropriate facility and enter your CPL Account # at the bottom of tab.
Select Save Modifications.
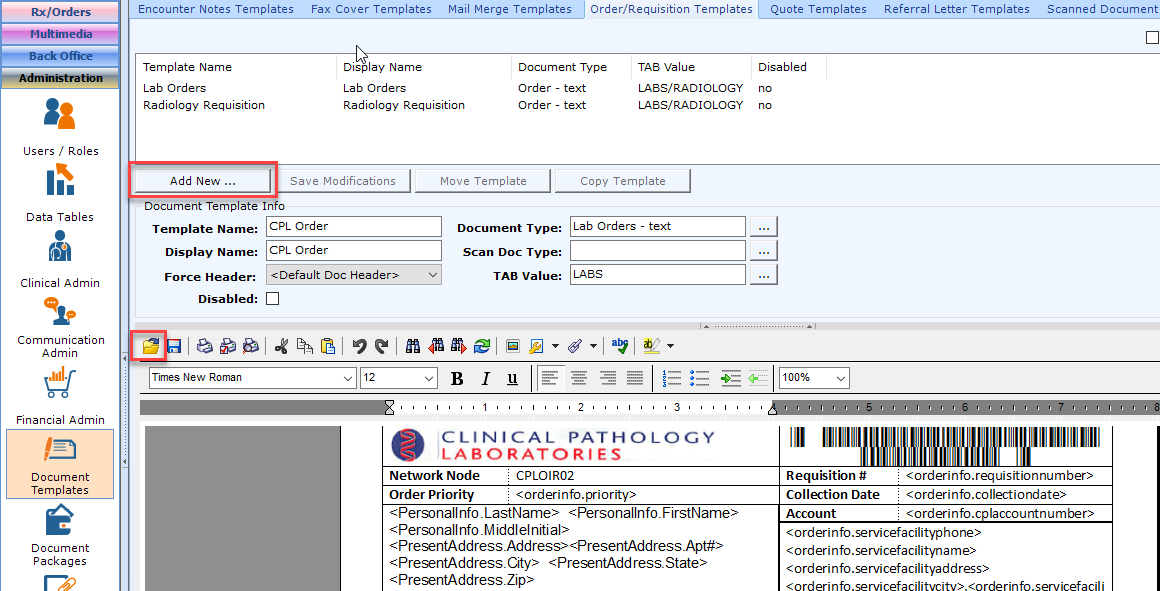
Load the Order Requisition Document Template
Download the template here.
Navigate to Administration | Document Templates, Order/Requisition Templates tab.
Select Add New and Complete the information.
- Template Name – CPL Order
- Display Name – CPL Order
- Document Type – Lab Orders – text. Note: If you do not see this document type in the list, contact PN Support at(800) 436-3150 ext. 2 or support@patientnow.com.
- TAB Value – Labs
Select the  button on the right side of the screen. Find the downloaded template and select Open. The document will show in the window below.
Select Add as New on right side of screen.
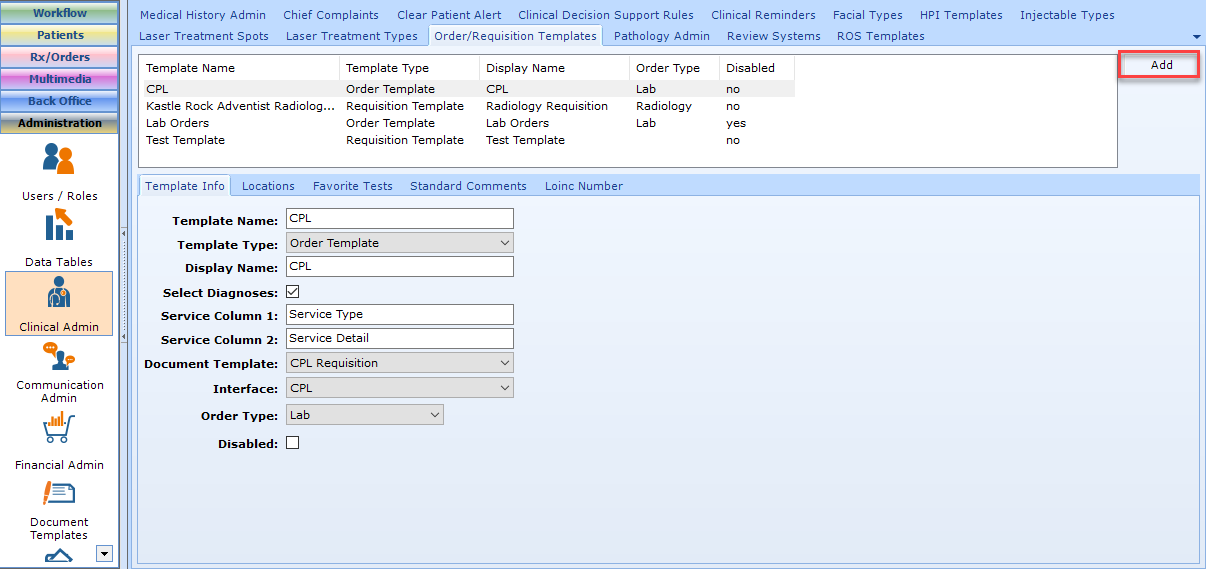
Create the Order/Requisition Clinical Template
Navigate to Administration | Clinical Admin, Order/Requisition Templates tab.
Select Add on the upper right side of the tab.
Enter the Template Info.
- Template Name – CPL
- Template Type – Order Template
- Display Name – CPL
- Select Diagnosis – checked
- Service Column 1 – Service Type
- Service Column 2 – Service Detail
- Document Template – CPL Requisition
- Interface – CPL. Note: If you do not see this option, the interface has not been enabled for your practice.
- Order Type – Lab
- Disabled – NOT checked
The information is automatically saved.
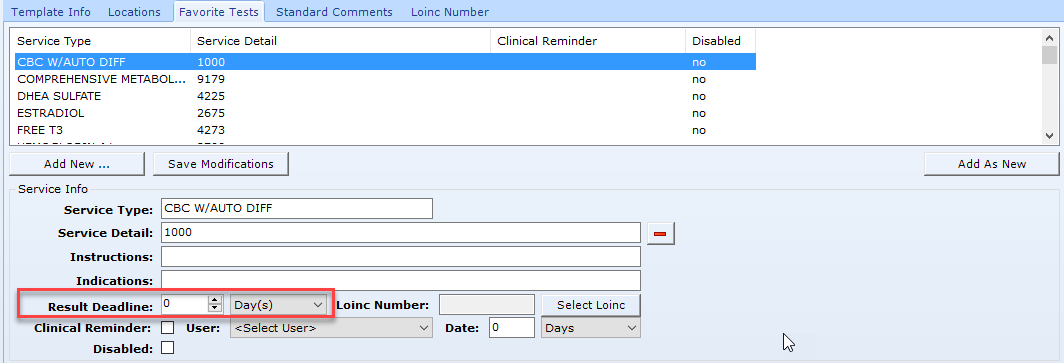
Configure your Favorite Tests, Panels, and Profiles
Things to Remember
CPL has 3 categories: test, panel, and profile. If you can’t find what you are looking for under test, try to search as a panel, and if you can’t find what you are looking for under panel, search profile. An example: CBC is a panel, but CMP is a profile.
You may select individual tests (TSH), panels (CBC) or profiles (CMP) as favorites or you may combine 2 or more to create a Custom Profile.
Configure your Favorites
Select the Favorite Tests sub-tab.
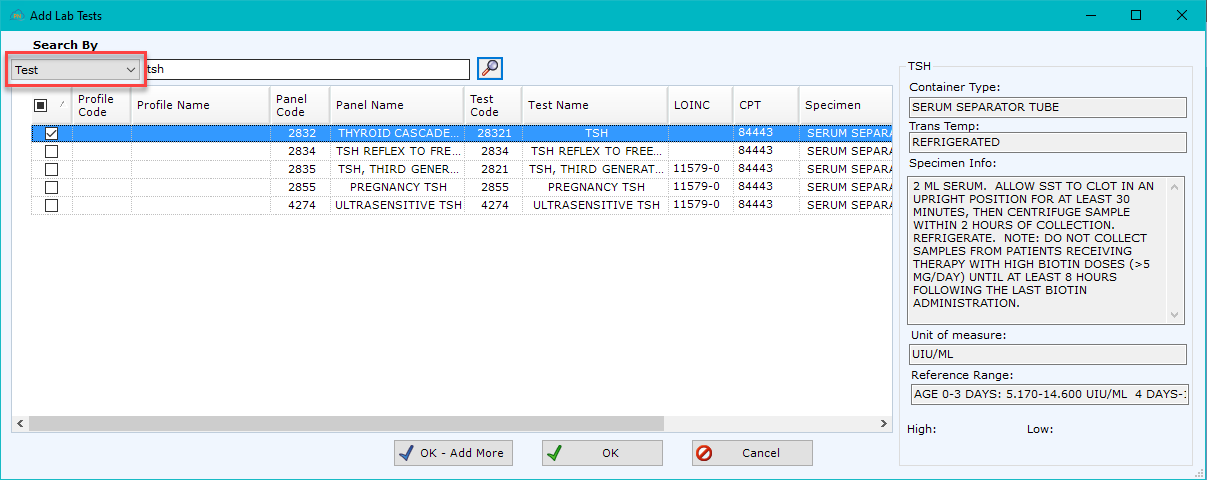
Select Add New. The Add Lab Tests dialog will appear.
- Select the Search by – test, panel, or profile and type the name or abbreviation in the box to the right.
- Select the search button.

- The list of tests that meet your criteria will display down below. Check the box on the left next to the test(s) you are selecting. Note: If you are selecting a panel (e.g. 1000 CBC), you will need to check the boxes next to ALL of the tests in that panel.
- Select OK, if you are done adding the favorite test, or OK – Add More if you want to select additional test codes to add to the Custom Profile.
- The Select Lab Favorite Detail dialog will appear. Enter a name and description for the favorite test.
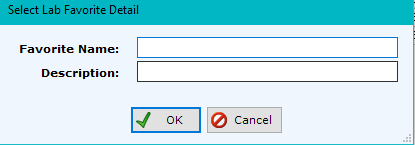
- Select OK.
Once the Add Lab Test dialog has closed, enter the Result Deadline (e.g. the test normally takes 3 days to receive the results, then enter 3 days).
If the test is not received in 3 days, the order will show as overdue in Workflow | Document Workflow, Orders/Requisitions.
Select Add as New. The Favorite will display in the Favorite Tests subtab and will be available to easily select when ordering.