Add a medication
Allows you to add a medication to a patient’s chart. This button is always enabled. However, it is only visible if the user or role has the Data Point Medications – Ability to Add access right.
When selected, the Select Medication dialog appears. Type in all or part of the medication name and click the search button. See Searching for Medications for tips on finding medications.
Search for the Medication
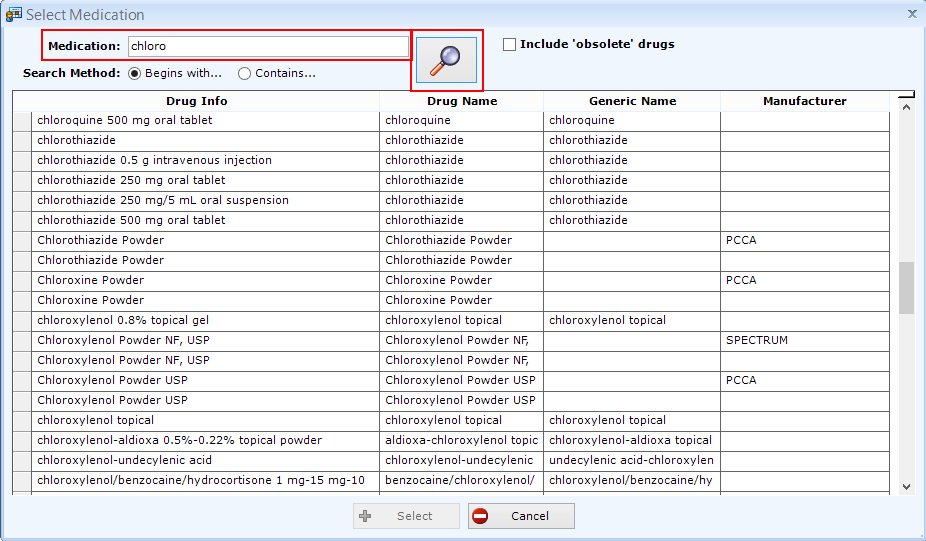
Scroll down to the correct medication and dosage. Highlight the correct medication and click the Select button. The Select button will not be enabled until a medication is selected.
Note: If you do not know the dosage, there will be a “blank” dosage record for each medication in the search. See highlighted record below.
Complete the Add Medication dialog
Add any instructions and select or enter the provider.
If the medication was prescribed by a doctor in your office, you may select them from the pull-down. If the prescriber was not in your office, you may just type the provider’s name.
Check the Administered in Office to document any medications give to the patient while they were in the office.
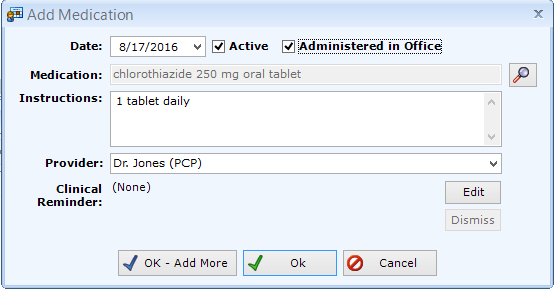
If you have other medications to add to this patient’s chart, select OK – Add More, otherwise, select OK.
Edit a Medication
Go to Patients | Clinical Information, Current Medical Tab and highlight a medication that was previously entered in the Medications section.
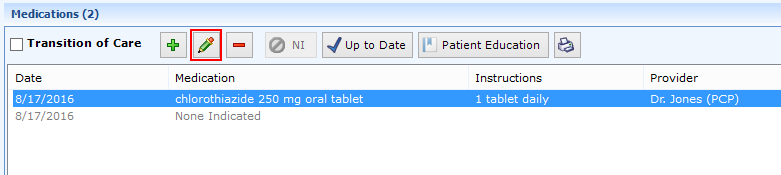
Select the Edit button. This button is enabled when medications have been added to the patient’s chart. However, it is only visible if the user or role has the Data Point Medications – Ability to Edit access right.
When selected, the Edit Medication dialog appears.
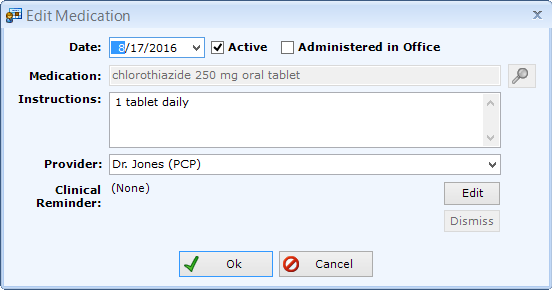
You may NOT change the medication. If the record was entered in error, delete the record and add a new record with the correct medication.
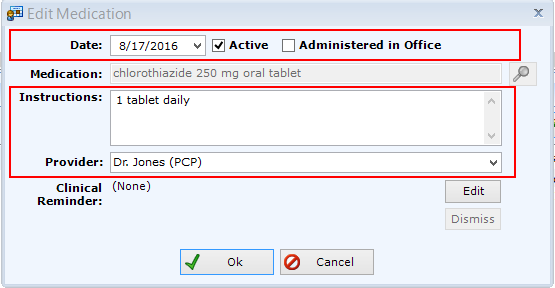
You may change the Date, check or uncheck the Active or Administered in Office boxes, or make changes to the Instructions or Provider. Just select OK when you are finished making the changes.
Delete a Medication
Warning: Deleting a medication record may increase medical liability for your practice. Please ensure that only authorized personnel have access to this functionality.
Go to Patients | Clinical Information, Current Medical Tab and highlight a medication that was previously entered in the Medications section. Select the Delete button.

This button allows you to delete a medication previously added in error to a patient’s chart. This button is enabled when medications have been added to the patient’s chart. However, it is only visible if the user or role has the Data Point Medications – Ability to Delete access right.
patientNOW will ask you to confirm your selection.If you respond Yes,the medication record will be permanently deleted. See Warning above.
Medications – None Indicated
Demonstrates that you asked the patient about medications and they advised you that they were taking none. This button is only enabled if there are no other medications added to the patient’s chart. When selected, it will create a None Indicated record.

Some notes about None Indicated:
- If a medication is subsequently added to the patient’s chart, the record will be disabled.
- The only editable field is the date of the record.
- You may select Up to Date and it will not disable the None Indicated record.
Medications – Up to Date
Demonstrates that you asked the patient about medications and they advised you that they have no changes to the medications in their chart. When selected, it will create an Up to Date record.
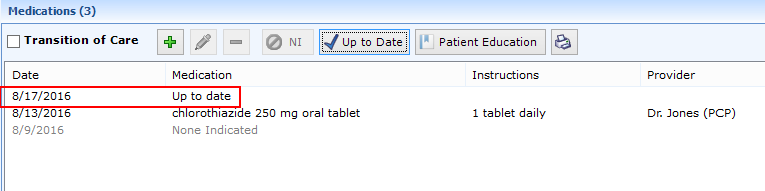
Some notes about Up to Date:
- If a medication, None Indicated, or Up to Date record is subsequently added to the patient’s chart, the record will be disabled.
- The only editable field is the date of the record.
- You may select Up to Date and it will not disable the None Indicated record.
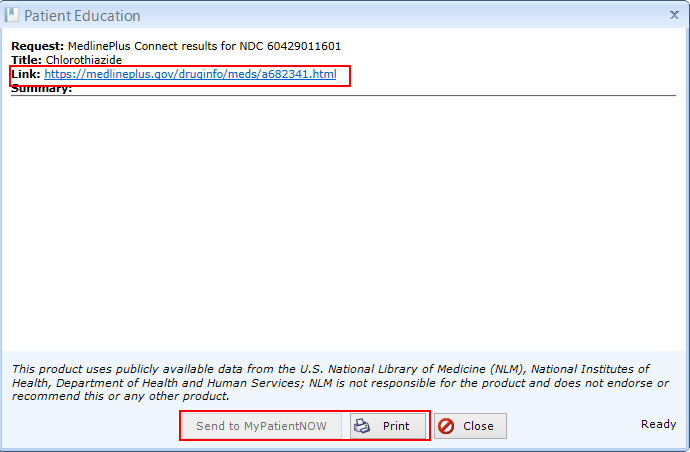
Medications – Patient Education
This button is only enabled if there are actual medications (not None Indicated or Up to Date) added to the patient’s chart.
When selected, displays a link to medication information from the National Institute for Health. This information may be printed or synced to the patient portal.
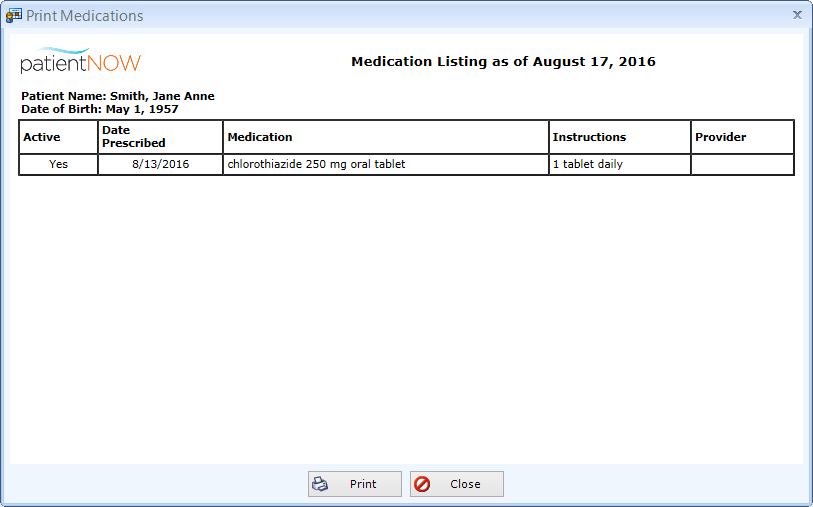
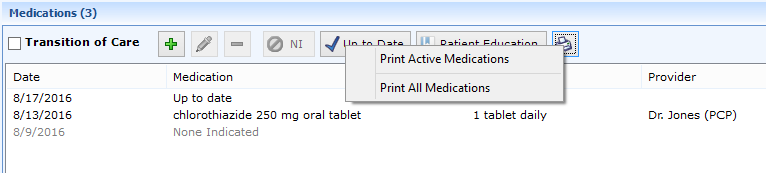
Print Medications
Prints either Active Medications or All Medications. Usually this is given to the patient for their records. This button is always enabled.
First, left click on the Print button, and select Active or All medications
When either option is selected, the Print Medication dialog appears. You may select the Print button for the listing to be printed to your default printer, and the Close button to close this dialog and return to the Current Medical tab.