Online Booking Configuration Video Walkthrough
Introduction
PatientNow’s online booking has been redesigned to make an effortless workflow for patients to follow. The beautiful redesign includes an auto-generated URL so practices may include it in emails to patients or directly on their website for easy booking. This article will outline all steps for online booking setup and use.
Basic Setup
- Appointment Resources
Appointment resources must be properly set up under Admin > Appt Types > Appt Resources. This is what PatientNow’s online booking system will use to determine available appointment slots for the particular service.
Ensure that the Allowed People, Allowed Facilities, Allowed Rooms, and Allowed Equipment are configured for each appointment type that will be offered to book online.

For more information on setting up appointment resources, please see Smart Scheduling – Configuring Appointment Types.
- Default Schedule
Make sure any provider that will be available for online booking has their default schedule set up. This is what PatientNow’s online booking system will use to display available appointment times for any given provider.

For more information on setting up default schedules, please see Configuring Default Schedules.
- Add Provider Profile Pictures & Select Gender
Adding profile pictures for available providers provides a more personal touch when patients book their appointments.
- Navigate to Back Office > People / Places > Providers.

- Click on the appropriate provider from the Provider list.
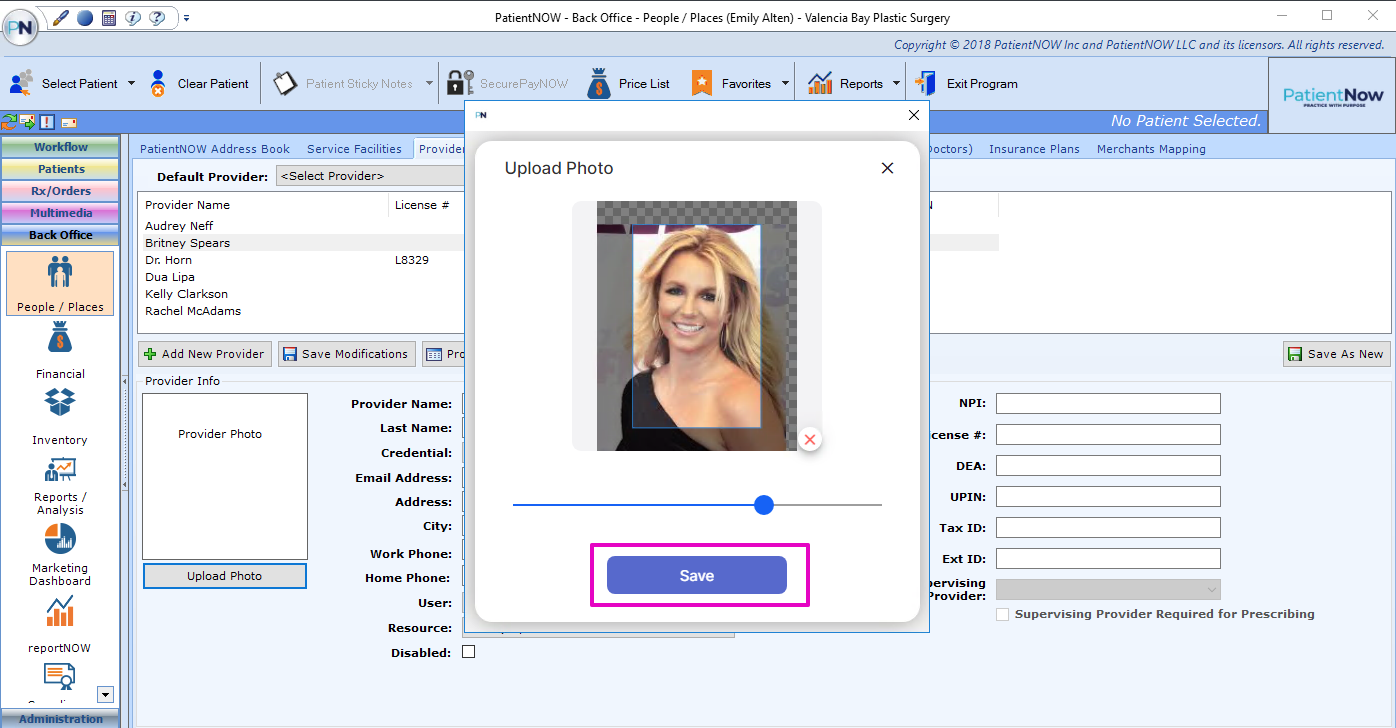
- Click Upload Photo.

- Click the camera icon in the popup window.

- Select a photo from the local desktop, then click Open to upload it.

- Adjust the photo’s size using the slider bar, and drag the photo to center the face.
- Once adjustments are complete, click Save.
- Click Save Modifications to save the image to the provider’s profile.

Select the appropriate gender for each provider that will be available for online booking is necessary for the gender filter to return correct results when patients book. See The Patient Experience for details.
- Navigate to Back Office > People / Places > Providers.
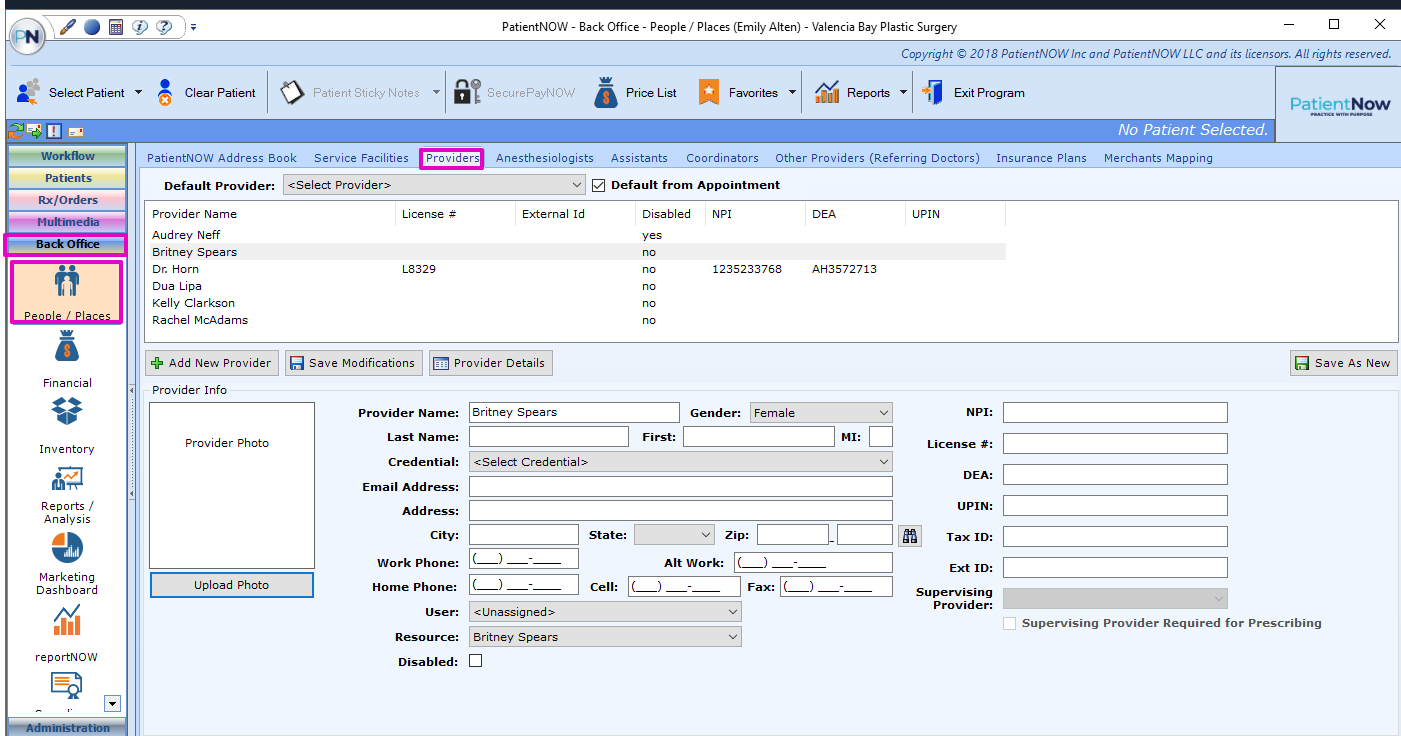
- Click on the appropriate provider from the Provider list.
- Use the dropdown menu to select the appropriate gender.

- Click Save Modifications to save to the provider’s profile.

Configuring the Online Portal
To configure which appointments are offered for online booking:
- Navigate to Administration > Online Portal.
- A new browser window will open.

- Add Categories
Upon the first time accessing the Online Portal will prompt you to add a new Visit Category. A Visit Category can be thought of as a main folder for Visit Reasons. Some common Visit Categories are:
- Consultations
- Laser Treatments
- Injectable Treatments
- Massage
- Facials
- Spa Services
To add categories:
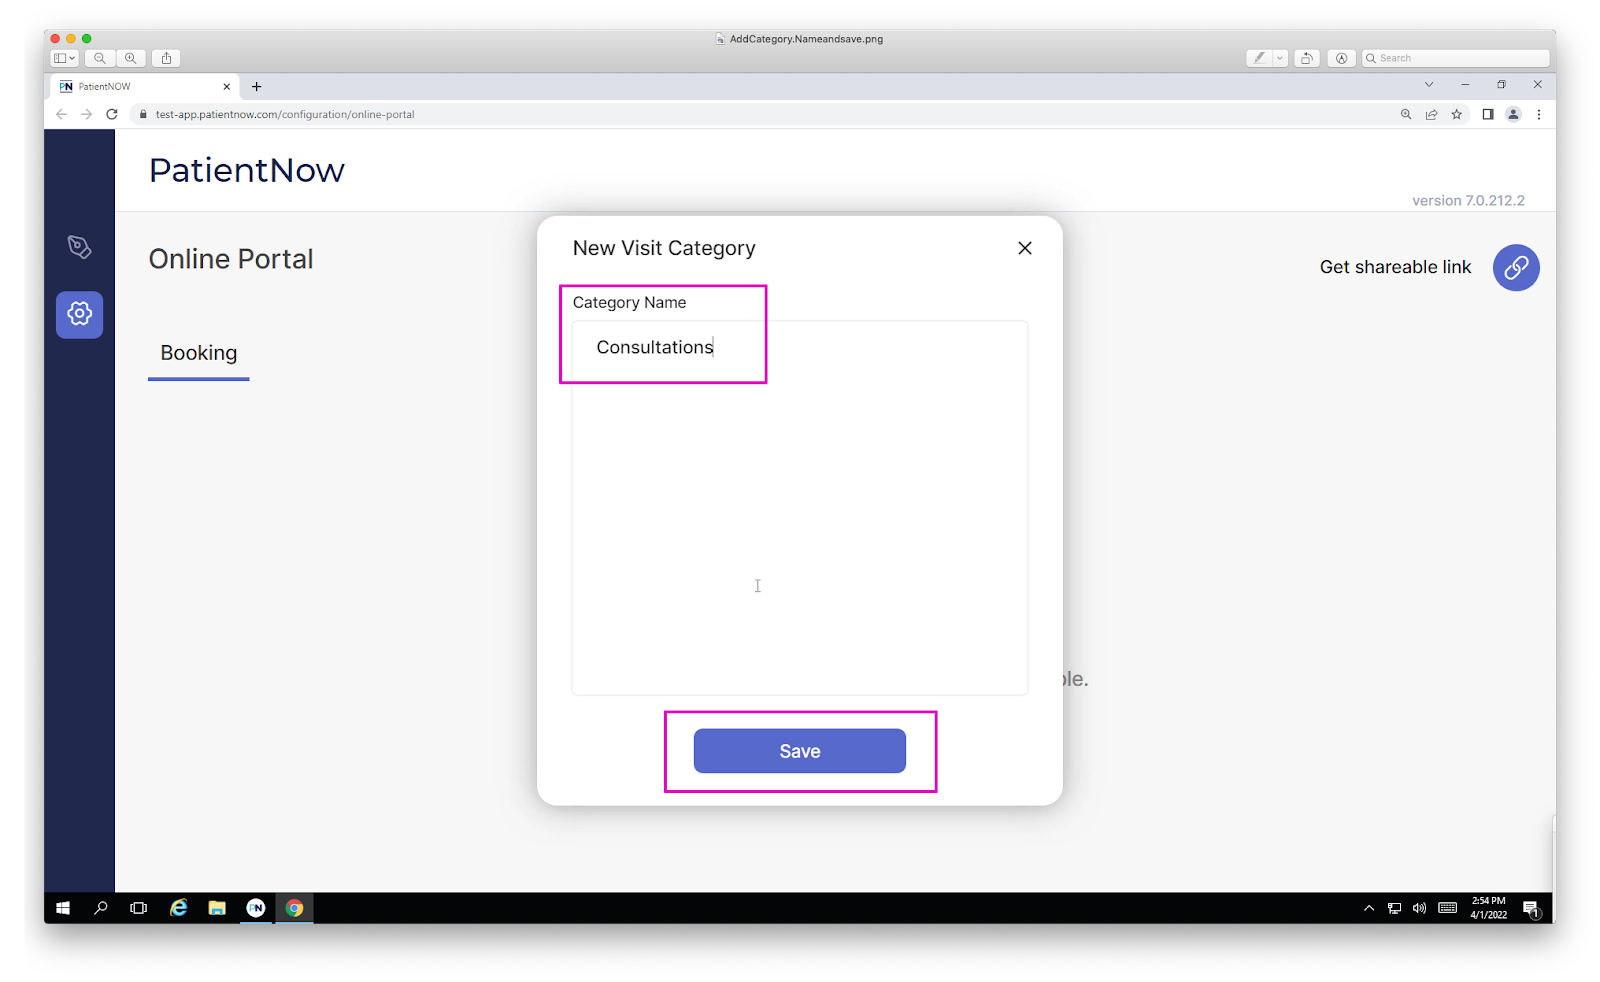
- Click the + New Visit Category button.

- Type in the Visit Category name.
- Click Save.
- Click Add Visit Reason to add all visit reasons to the visit category OR click No thanks! I’ll do this later to continue adding categories. Visit Reasons can be added at any time.

- Add Visit Reasons
Visit reasons refer to the type of appointment offered under any given visit category. Below are some examples of visit reasons:
- Neurotoxin consultation
- Filler consultation
- 60 minute deep tissue massage
- Laser hair removal – small area
- Hydrafacial, etc.
To add visit reasons:
- Click +New Visit Reason.

- Type in the Reason Name in the appropriate field.
- Use the drop down menu to select the appropriate Visit Category where the Visit Reason will be housed.
- Type a description of the visit (this step is optional.)
- Click Save.

Now the system will walk through the remaining steps to add:
- Appointment Type (pulled from the practice’s Appointment Types list.)
- Locations (if more than one location)
- Providers
Set Appointment Type
- Click the Set button next to Appointment Type.

- Use the drop down menu to select the appropriate Appointment Type.

- The Duration will automatically be pulled in from the practice’s settings for the appointment type on the PatientNow windows client.
- Click Save.

Set Location(s)
- Click the Set button next to Locations.

- Use the check boxes to mark in which locations the Visit Reason is available.
- Click Save.

Set Available Providers
- Click the Set button next to Providers.

- Use the check boxes to mark which providers are available for the Visit Reason.
- Click Save.

Finally, click Save after setting the Visit Reason, Appointment Type, Location(s), and Providers.

Continue the above steps to Add a Visit Reason until all reasons have been entered.
Editing Configuration
Visit Categories, Visit Reasons, Locations and Providers can be edited or deleted at any time.
Edit/Delete Visit Categories
- Click the ellipses next to the appropriate Visit Category.
- Click Rename to rename the Visit Category.
- Click Delete to delete the Visit Category. Note: All Visit Reasons under the Visit Category must be either reassigned or deleted first.

Copy/Edit/Delete Visit Reasons
- Click the ellipses next to the appropriate Visit Reason.
- Click Copy to copy the Visit Reason (this is useful for creating a new, similar Visit Reason quickly.)
- Click Edit to edit to make changes to the Visit Reason name, Appointment Type, Location(s) or Providers.
- Click Delete to delete the Visit Reason.

Edit/Delete Location(s)
- Click the ellipses next to the appropriate Location.
- Click Edit to add or remove Visit Reasons from the location.
- Click Delete to delete the Location. Note: All Visit Reasons associated with the Location must be reassigned or deleted first.

Edit/Delete Provider(s)
- Click the ellipses next to the appropriate Provider.
- Click Edit to add or remove the Provider from a Visit Reason.
- Click Delete to delete the Provider from the Online Booking portal.

Accessing the Online Portal
Once the Basic Setup and Online Portal Configuration are complete, now the practice and patients may access the Online Portal to book their appointments!
- To create a link for the Online Portal, click Get Shareable Link.
- Click Copy Link to copy the link to the computer clipboard.
- Open a new window or tab, and paste the copied link.

How to Use the Shareable Link
Most common use cases for the shareable link are:
- Add the link to marketing emails to clients as a hyperlink.
- Create a Book Now (or similar) button on the practice’s website for easy booking.
- Allow patients to book online directly from registering or returning to myPatientNow.
Note: Enabling the Online Booking portal from myPatientNow requires checking the box “Enable new Online Booking portal in myPatientNow portal,” which can be found under Administration > Data Tables > myAppointmentNow.
